
Many IoT devices rely on CR2032 coin cell batteries, but their battery life can be limiting—especially when increasing sampling frequency.
A battery eliminator is a simple way to replace the coin cell with an external power source.
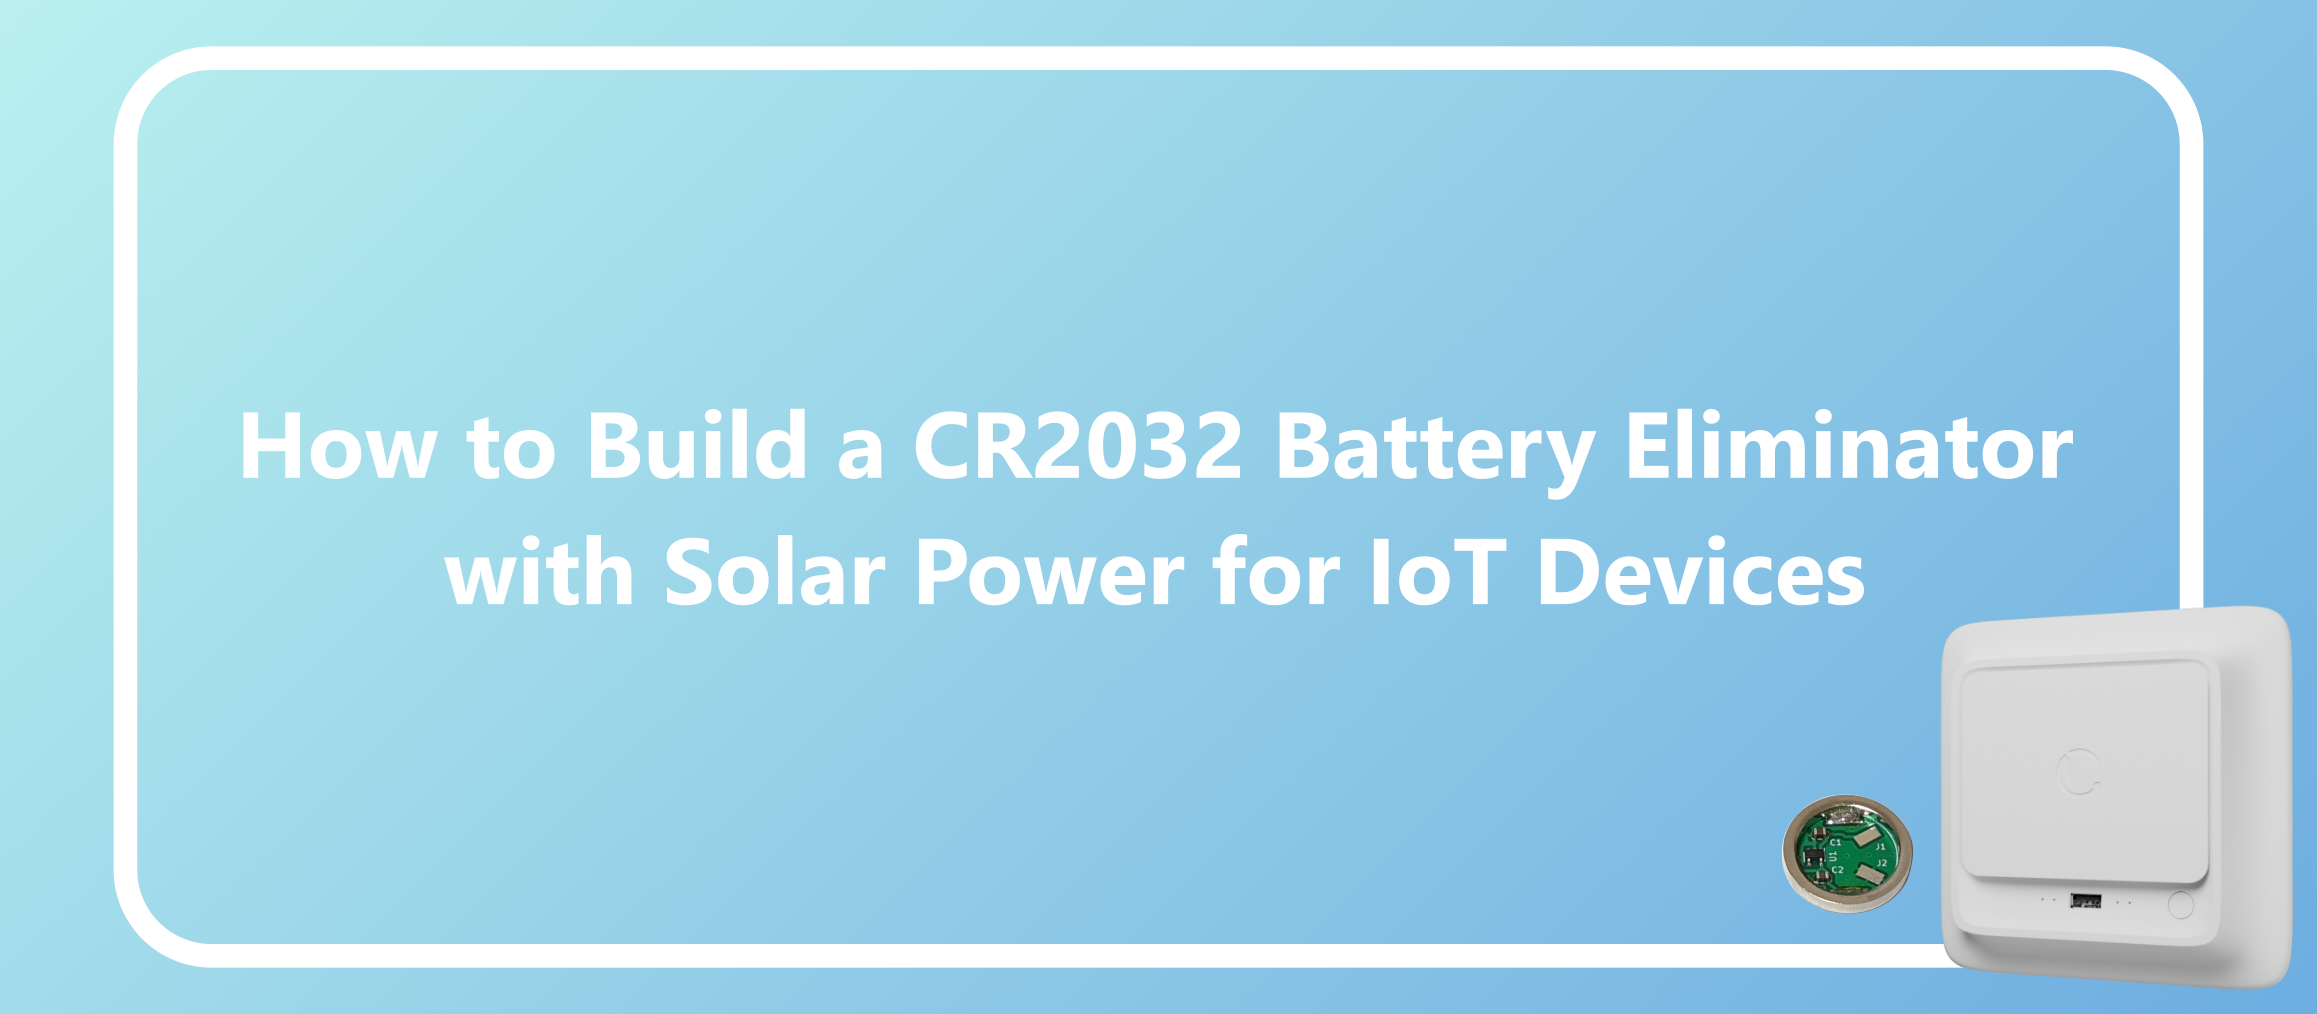
In this article, we demonstrate how to convert a battery-powered IoT sensor into a solar-powered system using a CR2032 battery eliminator.
What is a battery eliminator
A battery eliminator is a device that allows you to power an electronic device without using its internal battery.
Instead of a battery, it supplies power from an external source such as USB or a regulated power supply.
In many cases, a battery eliminator is implemented as a “dummy battery” – a battery-shaped adapter that fits into the battery compartment and connects to an external power source.
For coin cell devices, such as those using CR2032 batteries, a dummy coin cell can act as a battery eliminator by providing a stable external voltage.
Components
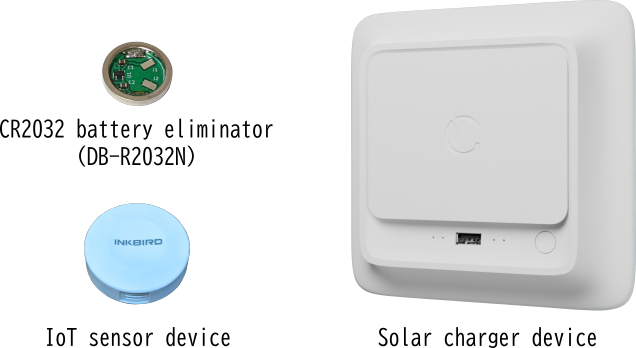
The system consists of:
– CR2032 battery eliminator (DB-R2032N)
– IoT sensor device
– Solar charger device
– USB cable
Drill a hole for the USB cable
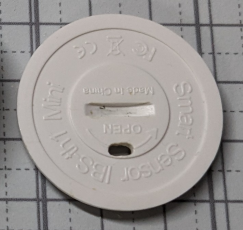
First, when inserting the dummy coin cell into the IoT device, a hole is required to pass the USB cable through.
So, we drill a hole in the battery cover of the device.
Since only the inner wires of the USB cable need to pass through, we drill two holes of about 1.5 mm each.
Then, we use a file to connect the holes and shape them into a single elongated opening.
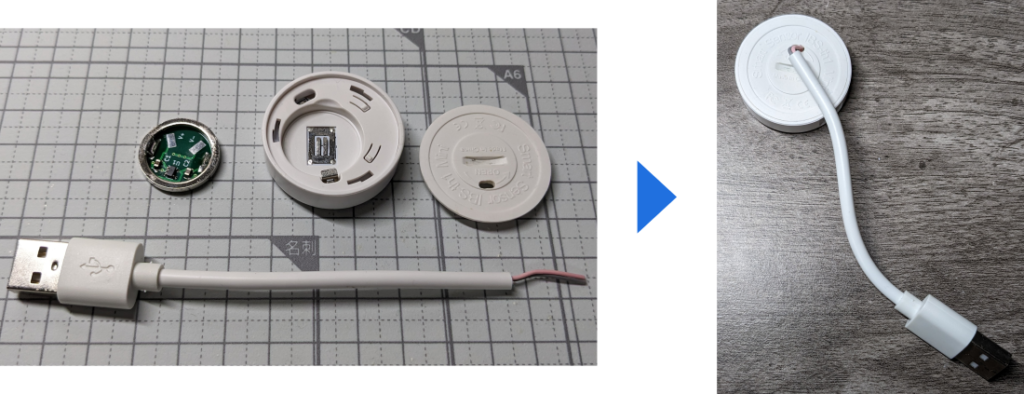
Strip the USB cable to expose the inner wires

The USB cable included with the solar charger (as an optional accessory) was a Type-A to Type-C cable.
For this project, we cut off the Type-C connector using wire cutters.
Next, we stripped the outer insulation of the cable to expose the inner wires.
There are four wires inside the cable: V+, V-, D+, and D-.
Looking closely, the power lines (V+ and V-) are slightly thicker than the others.
Since the data lines (D+ and D-) are not needed for this project, we cut them off at the base.
The positive power line (V+) was a pink wire, and the negative power line (V-) was a black wire.
Connect the battery eliminator to the USB cable
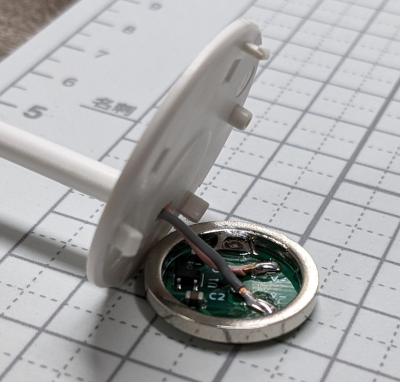
Solder the USB cable to the battery eliminator.
There are a couple of important points to keep in mind:
1. Make sure to pass the USB cable through the cover before soldering.
2. Be careful, as the insulation on the inner wires melts easily.
These are common mistakes that you often realize only after soldering—so take care!
In fact, I forgot to route the cable through the cover before soldering the first time😅
Also, since the inner wires of the USB cable are quite thin, we applied additional potting to reinforce the connection.
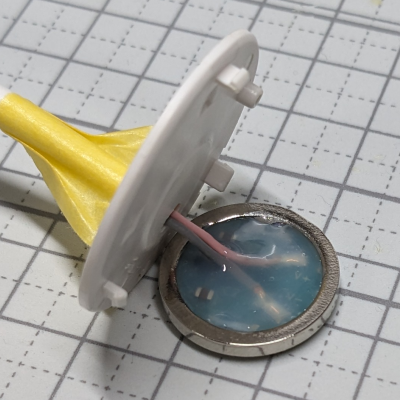
The yellow material is masking tape.
It is used to prevent the cover from sticking to the silicone while it cures after potting.
Install the battery eliminator into the IoT sensor device
There’s nothing particularly difficult about this step, but make sure to place the battery eliminator into the case without twisting or pulling the wires.
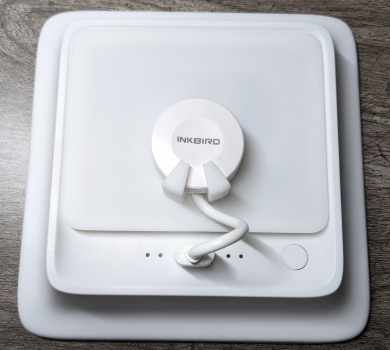
Attach the IoT sensor device to the solar charger
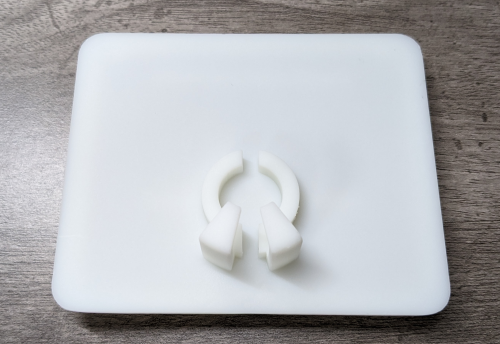
For this project, we redesigned only the cover of the solar charger so that the IoT sensor device can be mounted onto it.
The design data was sent to a 3D printing service for fabrication.
When the IoT sensor device is assembled with the solar charger, it looks like this:
Conclusion
In this project, we enabled long-term operation of an IoT sensor device using a battery eliminator and a solar charger.
With a battery eliminator, devices can be powered not only by solar panels but also by an AC adapter or other external power sources.
It is also possible to use alternative batteries, such as CR123A, to power devices originally designed for coin cells.
By applying this approach, BLE-based beacons—such as those used for location tracking—can also be operated at shorter sampling intervals while maintaining long operating time.
Learn more about the CR2032 battery eliminator here.
